DIY How To: Paint Your Kitchen Cabinets Pt. 1 Prep
Took the week off for July 4th! Back at it this week with a fun new project.
My fiance recently bought a duplex. The plan is to move into the duplex when my house sells and rent out the other side (more on this under House Hack ).
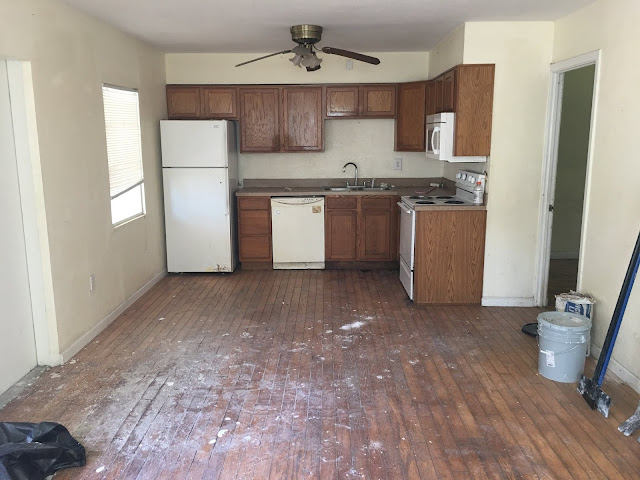
We are in the process of completely renovating the place. Part of that is the kitchen! The kitchen cabinets are one of the few things in the house that is in pretty good shape so instead of replacing them for thousands of dollars, we decided to paint over the existing cabinets for hundreds...
Full disclosure: this is my first time trying to paint kitchen cabinets! We reached out to a friend of ours that does this for a living and she recommended the following products/procedures:
1. 220 Grit Sandpaper - our cabinets were pretty dingy, they needed a lower grit to clean off the dirt/drywall/etc.
2. Denatured Alcohol - any brand will do!
3. PPG Breakthrough Paint (in the color of your choice)
4. Sponge, paint brush, misc accessories to apply
STEP 1: TAPE OFF AND PROTECT ADJACENT SURFACES...
We're replacing all the appliances and floors so not much taping/protection was involved. But if you're painting/prepping next to finished surfaces you intend on keeping use a good quality painters tape and OVER compensate on the plastic. It's always better to be safe than sorry!
STEP 2: TAKE DOORS OFF HINGES AND DRAWERS OUT...
Self explanatory, but it really helps with the next few steps. If you can take the shelves out do this as well. Ours were pretty stuck in there so we just taped them off.
STEP 3: SAND THE CABINETS...
We had some drywall and paint splatter on the cabinets so we used the 220 grit sand paper to sand that off before starting anything. You may not need this low of a grit if your cabinets have normal wear and tear (even as high as a 400 would be fine). A light sand!
STEP 4: RUB DOWN WITH DENATURED ALCOHOL...
Go through and rubbed everything with the sponge dabbed with denatured alcohol. Rub it along the cabinets. It takes off all the extra goo/sawdust that sanding left behind.
At this point your kitchen and cabinets are ready for paint!


Comments
Post a Comment